Friday, December 11, 2009

Christmas Truffles, Part 2


That's right, Annie, they're Christmas trees!

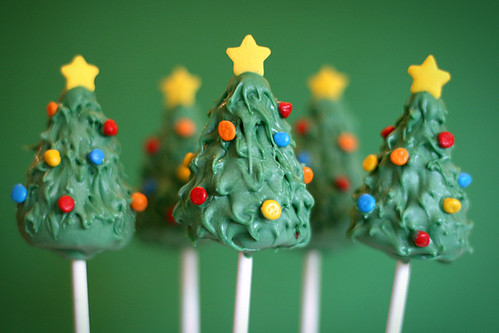
 Again, credit must go to Bakerella as I got the idea from her.  Here is where I got my inspiration:


So cute!  As you can tell, mine are a little bit...heftier.  Also, her ornaments and topper are more to scale, but she is the pro after all.

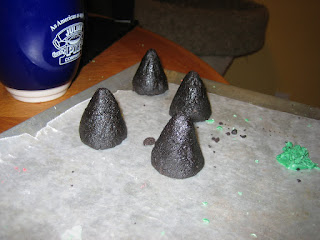
Again, I choose to leave off the stick.  The process starts the same way as with the hats:  Make cones:


Melt chocolate:


And then dip!  Nothing fancy this time, because it is all one color.  To do this I used a bamboo skewer through the bottom (about halfway through).  After dipping, use a toothpick to make the "branches":  You can either work fast and do it while the coating is still wet, or you can add them later.


Once the chocolate has hardened, twist the skewer to loosen and then remove.  Be sure to plug the hole left by the skewer, or it will leak.  

Finding toppers and  "ornaments" was kind of difficult.  Were I to do these again, I would use the rainbow chip sprinkles like Bakerella suggested.  Instead, I used these little guys:


I like the colors of these, and I like their shape, but they are just too big I think.  For the topper, I used a star sprinkle-- if I could find the jumbo ones Bakerella used, I would have preferred them.  I really like the effect they had.


Even though they aren't quite as cute as Bakerella's, I think they turned out rather well, especially when paired with the little hats from Part 1:


Aww!  Success!  I hope my coworkers like them!


Thursday, December 10, 2009

Christmas Oreo Truffles Part 1


These little cuties are for my office pot-luck next week, and they are inspired by the wonderful Bakerella.  First and foremost, the recipe:  Oreos, cream cheese, and chocolate.  How could one possibly go wrong?!

Secondly, the design:


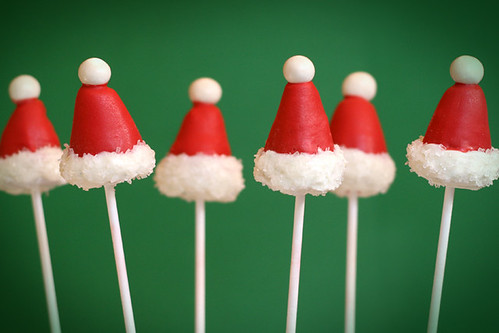
I absolutely love these adorable Cake Pops that Bakerella whipped up, but the sticks can be cumbersome so I decided to modify the design and do them without the sticks.  Starting out I knew that mine could never be as adorable (or photographed as well!) as hers, but I did not let that dissuade me.


First you take the oreo and cream cheese mixture and form it into cones.


Once they are all shaped, freeze them until firm.


Melt some white melting wafers and dip the wide end of the cones into the chocolate, about 1/4 of the way up.  Shake off any excess chocolate and allow to dry.  I did this by making little foil supports to hold them upside down while the chocolate set.


Once the chocolate is completely set, melt some red wafers and dip the remaining exposed truffle into it.  Be sure to cover every seam!  Set right-side-up to dry.


While the red chocolate is still a little wet, place a small white candy on the top.  I used gumballs, but any candy will work so long as it is approximately round.


Finally, using a toothpick or knife, spread a thin coat of white chocolate over the bottom part of the hat (over the part of the sides already dipped in white chocolate--leave the bottom dry) and roll in sanding sugar to get that "fluffy" effect.


All done!


These were a little putzy, but they didn't take terribly long to make.  I made the cones last week and just kept them in the freezer until I decided to dip.  The covering and decorating process took less than an hour altogether.

I feel like even if they were tedious, the time investment really shows.  I would love to package these up in little boxes with bows-- how cute for the holidays! Stay tuned for Part 2!