
Weeks go by, and I have mostly forgotten about the cake, figuring they had changed their plans or decided to go with someone else. I head off on my summer vacation, thinking nothing of cake. Upon my return, she prompts me again if I would be up to it. I decide to take it on (shoe cakes are fairly popular, and I had seen enough pictures to know that I was capable of at least falling in the middle of the pack). I still did not know what to charge, though, so I left that part up in the air for the time being, hoping that once I figured out more of what I was doing I would have a better idea of an appropriate price.
The first part I learned about carving cakes is that dense cakes are best (Pound Cake, Mud Cake, Butter Cake, etc...), because they don't smush as easily. I knew that this cake was primarily for show-- they said they might eat it, but the main cake was going to be provided by cupcakes -- so I wasn't terribly concerned about flavor. I chose a simple pound cake to serve as my sculpting material. My goal was to make the cake look almost life-sized, so I shot for about 10 inches from heel to toe.
Some shoe cakes are started with cake baked in loaf pans, but I didn't want to deal with more seams than I needed to so I opted for a basic 9 x 13 cake as my starting point. I found a picture of a Converse sole online and enlarged it to meet my size specifications. Once the cake was cool, I stuck it in the freezer for a few hours to firm up even more. Then it was simply a matter of placing the printed template on top of the cake and starting to cut.

Since I was going for a hi-top, I also needed an extra half-sole piece for the ankle. A little frosting (just simple buttercream) to hold them together, and tada!
 |  |
Looks just like a shoe, right?!? Well, it's a starting point, at least.
Next comes the really nerve-racking part-- carving. As they say, it is much easier to cut away than it is to reattach, so this part made me especially nervous. I was terrified about cutting off too much and not being able to fix it-- and my air conditioning is currently kaput so I was dreading the idea of having to bake any more cake.

After much agonizing cutting, I finally had what I felt amounted close enough to a shoe to be able to apply the base layer of frosting (called a "crumb coat" in the biz). This is what the fondant sticks to, and it seals the cake so it doesn't lose too much moisture.

It was trickier than I expected to be able to frost all of those funny angles. It took me a little while to ensure that I had a thin, even coat over the whole thing.

This then went back into the fridge while I contemplated how I was going to decorate. I knew I wanted to use fondant, because my buttercream skills are not even close to being at the level where I could manage that. Plus, in the current heat wave, fondant holds up much better. I then had to decide whether or not to use Marshmallow Fondant. Normally this is my go-to fondant, because it is cheap and tasty. But flavor was not really the object here, and I was concerned about the consistency. Sometimes the marshmallow fondant I make is too thin, and then it tears easily when applied to the cake, which would be a nightmare to deal with. Other times, it is too thick and then I have trouble getting it rolled out thinly enough for the fine details.
No, this time I was going to break down and *gasp* buy fondant. 24 ounces for $7 is still crazy, but I just couldn't risk screwing it up. Plus, I had enough on my mind to worry about, and not having to think about making the stuff did help alleviate some of the stress.
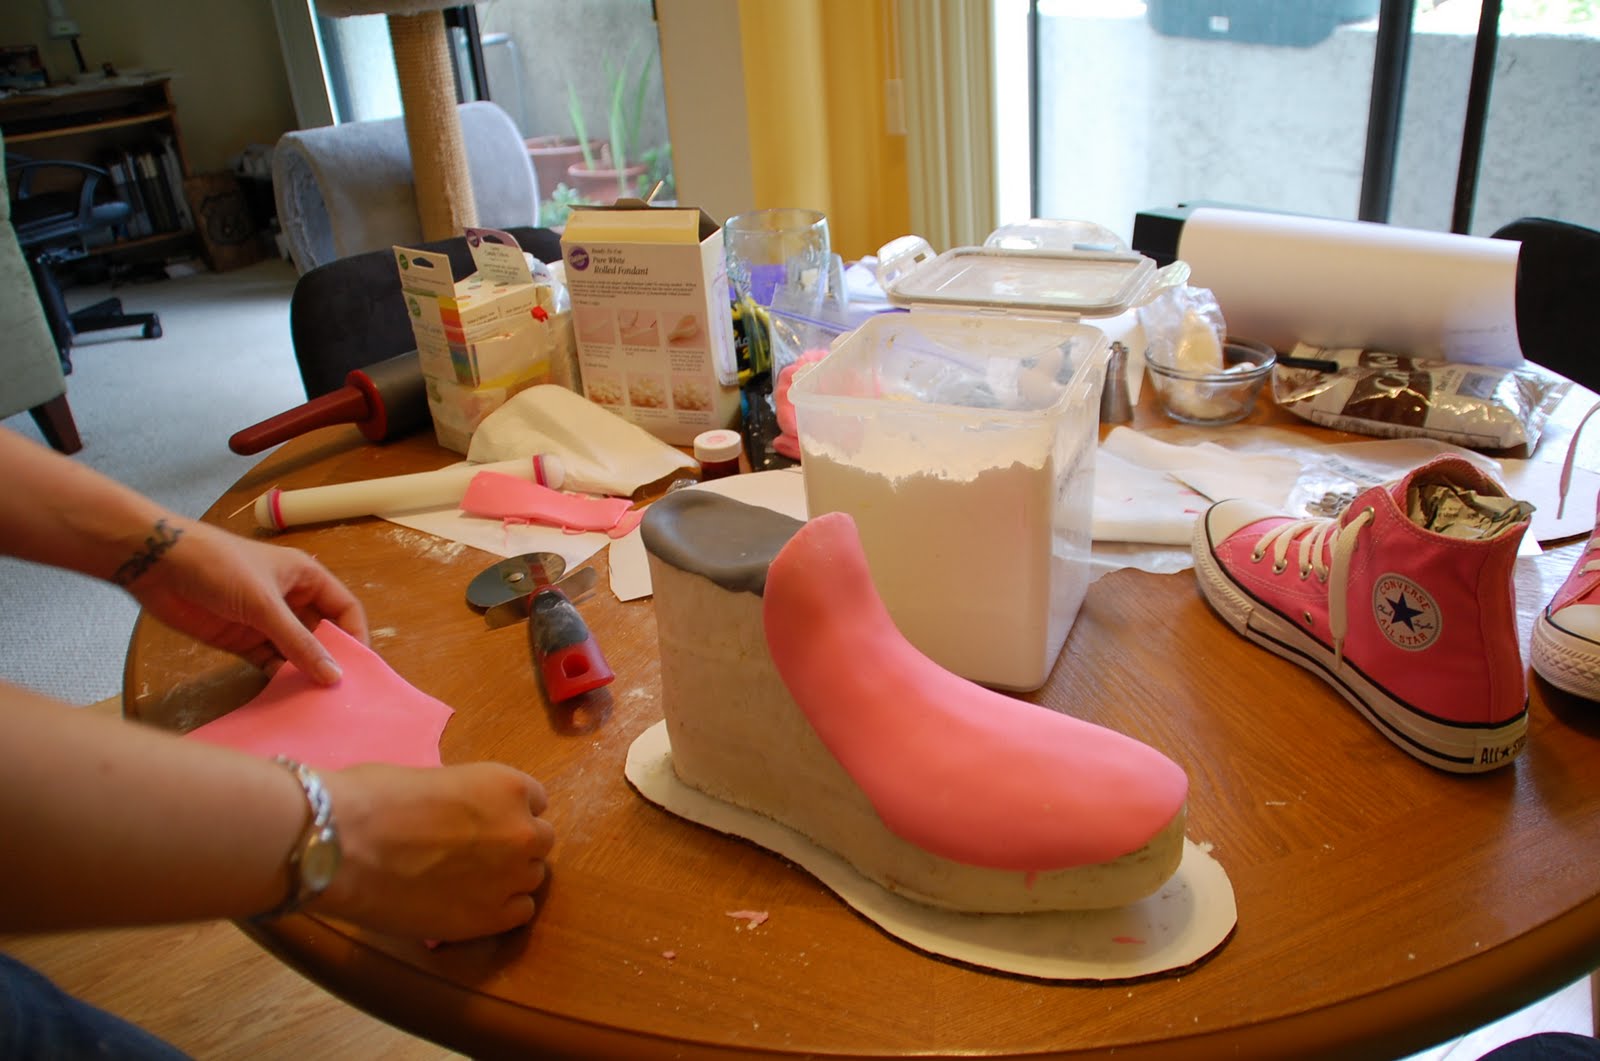
So now that I had fondant, I had to figure out how to cut it. Normally, to cover a cake you just roll out and drape it over, but this was different. Converse are made with layers of overlapping canvas. I decided the easiest way to replicate that look was to treat the fondant like fabric. For that to work, I would need a template. Unfortunately, the only one I could find was for baby Converse, which don't work so well when blown up to adult sizes (unless this were for a girl with club foot).

They were a good place to start, but required quite a bit of altering in order to match the dimensions of the shoe. The three main pieces were the tongue and the two sides, and those required the most tweaking.

After cutting out the first pieces, I began assembling them on the cake. This was also nerve racking, because removing the fondant once it was placed ruined the underlying buttercream and made subsequent applications more difficult. This meant sometimes I had to do some trimming after the fondant was attached to the cake.
From there on, it was just a lot of guesswork and experimentation in order to get the details right. One of the hardest things to remember was that order matters! First the tongue, then the sides, then the toe cap, followed by the rubber around the sole (notice below that I did not remember the toe cap...had to go back and fix that one!).

One of the improvised techniques I used on this that I am quite happy with was how I made the eyelets for the laces to go through. First I tried making rings out of a thin piece of gumpaste rope I rolled out, but they ended up looking like cheerios and not even close to professional. This was one of the details I really wanted to perfect, since I knew they would look so terrible if they were done poorly. Eventually, I realized I could use my large circular piping tips like cutters to cut out small circles, and then punch out their middles with an even smaller tip. Then, a little painting with silver luster dust mixed with clear vanilla, and they looked almost like the real thing!

The other difficult thing was figuring out how to do the seal that is on the inside ankle of all Converse hi-tops. Scouring the internet revealed the many uses of Rice Paper (aka Wafer Paper) as a clear edible canvas. Using my edible markers, I traced the seal onto the rice paper and then mounted the rice paper onto a circle of fondant with clear piping gel. The same technique was used for the "All Star" text on the heel.

I made the stitches by just indenting the fondant with a toothpick, rolled out fondant laces and attached them to the shoe with more piping gel.

After applying the rice paper decals, they wanted to curl away from the fondant, so a little plastic wrap encouraged them to stay in place.

All done! How purdy! Even though this was still clearly a first-try, and I am not totally happy with it (the black fondant stripe around the top of the sole isn't completely straight, and that bothers me), it is a very good representation of the thing I was told to make, and it is completely edible! How about that!

From this angle it looks like it could be a real shoe, even. That is quite cool. I am very pleased with the seal. I think the rice paper was by far the easiest way to achieve good results, and the clarity is impressive.

The cake was delivered today, and everyone was very happy with it. I never did quote a price for it, though (oops!), so there was a slight awkward moment when it came time to accept payment. The amount was perfect (even a little bit above what I would have quoted), and I think she really believed it was worth the price.
Overall, I am very pleased with how it all came together, and with my efforts. All with no air conditioning, mind you!